





If your Bermuda grass lawn looks more like a patchwork quilt than a putting green, you’re not alone. How to take care of bermuda grass might seem like a seasonal guessing game, but it’s really about timing. This warm-season turf runs on a strict growth clock, and most lawn failures come from ignoring it.
Turfgrass researchers at university extension programs still anchor their care recommendations around a 1 to 1.5 inch mowing height and a 65°F soil temperature threshold for green-up, as of 2026. Nail those two numbers, and the rest becomes easier. Let’s walk through the decisions you’ll face all year.


Image source: Bing (Web (fair-use with source credit))
Quick Answer
Mow Bermuda grass low and often. Water deeply but rarely. Fertilize only after 50% green-up.
Prevent weeds with a pre-emergent in early spring. Scale back in fall and let it go dormant.
Why Bermuda Grass Lawns Fall Apart (and How to Save Yours)
Most Bermuda grass failures trace back to treating it like a cool-season lawn. It’s not. Fescue wants tall mowing, frequent water, and fall feeding.
Bermuda wants the opposite: short mowing, deep but rare water, and summer feeding.
The grass itself is so aggressive that it’s classified as a weed in several regions. It spreads through stolons above ground and rhizomes below. When you let it grow tall, sunlight can’t reach the crown, and the lower leaves die off.
That’s what creates those thin, woody patches.
Here’s the pattern we see in our research. Homeowners fertilize too early, water too often, and rarely mow low enough. All three are solved by understanding the growth cycle.
The Real Endgame: Understanding The Hype
Bermuda grass earns its reputation as the “golf course grass” because of how it handles heat. It stays green when cool-season lawns crisp up. It repairs itself quickly from foot traffic.
And it creates a dense carpet when you keep the blade low.
But that density comes from short mowing. If you treat Bermuda like a meadow, it turns into a stemmy mess. The entire care strategy changes once you accept that this grass thrives under stress.
It’s built for the South, the summer, and the lawn mower set at its lowest setting.
The takeaway is simple. Match your care to the grass’s natural rhythm, not the calendar. And if you’re unsure what your lawn actually needs, remember that a soil test takes the guesswork out of feeding.
The Time Clock: How Dormancy Controls Every Decision
Bermuda grass goes dormant when soil temperatures fall below 65°F. That usually happens in late fall and lasts into early spring. In that state, the lawn looks dead, but it isn’t.
The crown stays alive, and the root system keeps working at a slow pace.
If you keep watering and feeding during dormancy, you’re wasting money and inviting disease. The grass can’t use nitrogen when the soil is cold. That’s why the calendar is a terrible guide.
A warm spell in January doesn’t mean the grass is ready to wake up.
Turfgrass researchers at Texas A&M AgriLife Extension have published detailed soil temperature charts that align with Bermuda’s dormancy windows. Checking your actual soil temperature is far more reliable than waiting for a specific date. You can buy a simple soil thermometer online, or you can track local readings from a nearby weather station.
Why the Calendar Lies (and the Grass Doesn’t)
The biggest mistake we see in aggregate reviews is the “Easter rule.” People wait until a holiday to fertilize, and then they do it while the grass is still brown. That nitrogen feeds winter weeds instead, and the Bermuda gets nothing.
The grass knows when it’s ready. It responds to soil warmth, not to the date on your wall. That’s why the 50% green-up threshold matters.
It’s a visual signal that the root system is waking up and the blades are ready to grow.
Once the lawn hits that point, you need to move fast. The spring window is short, and every week of delay means more time for weeds to take hold.
The Spring Wake-Up Test
Before you do anything, take a slow walk across the yard. Look at the overall color. Are you seeing patches of green spreading across the lawn, or just a few sun-warmed spots?
The grass should be about half green before you start aggressive care.
If it’s still mostly tan, keep waiting. If you see 50 to 60 percent green coverage, the lawn is waking up. This is your green light to scalp, fertilize, and start the season.
This is also the moment to check for thatch. If the soil feels spongy underfoot, you have a thick layer of dead stems. That’s normal after a few years of growth, but it needs to be removed.
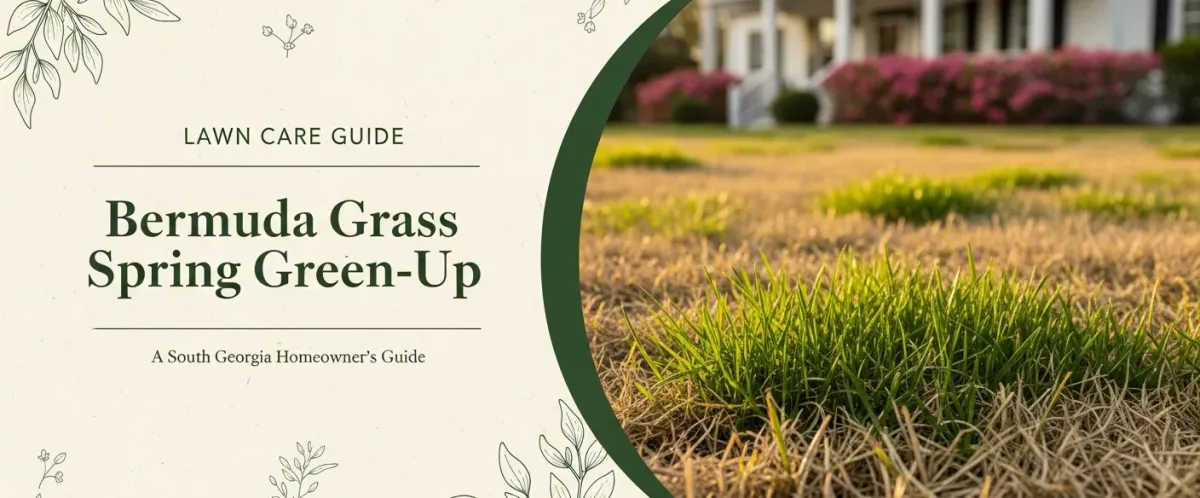

Image source: Web (Bing) / elitelandscapesga.com (Web image (fair-use with source credit))
Checking for the 50% Green Threshold
The 50% rule is the single most reliable signal in Bermuda care. It tells you the root system has woken up enough to handle nitrogen and low mowing. Feed too early, and you waste fertilizer.
Mow too early, and you expose the crown to frost damage.
For a clearer read, check soil temperature as well. When it hits 65°F at a 2 inch depth, you’re in the green zone. Many university extensions publish daily soil temps by region, so you can check those online without buying a thermometer.
Once the lawn is half green, it’s time to act. The window usually only lasts a week or two, so don’t delay.
Scalping: The First Mow of the Season
Scalping sounds aggressive, but it’s necessary. Set your mower to 1 inch or slightly below. Then cut the entire lawn, bagging the clippings.
This removes all the dead, brown tissue from last winter and lets the sun hit the soil directly.
Warmer soil means faster green-up. It also gives new stolons room to spread across the soil surface. If you skip scalping, the dead growth blocks sunlight and slows the whole process.
Just be careful not to scalp too low during a cold snap. If frost is forecast, wait for it to pass. A single freeze right after scalping can damage the crown.
If you’re unsure about the right height for your specific mower, check the proper cutting height for thick, green growth.
This is also a good time to address any thick thatch buildup. The dethatching process pulls up the dead spongy layer and opens the soil surface. Do it right after scalping while the grass is still short.
The Weed Control Fork in the Road
Now you have to choose a weed strategy. And the decision comes down to one question: will you be planting any seed this season?
If your lawn is established and you’re only feeding existing Bermuda, put down a pre-emergent herbicide in early spring. Apply it when soil temperatures reach 55°F. That creates a chemical barrier that stops crabgrass and other annual weeds from sprouting.
If you plan to overseed with ryegrass this fall for winter color, skip the pre-emergent in that window. The chemical barrier will kill the ryegrass seed before it can germinate. You’ll have to rely on post-emergent herbicides instead, which means spot-treating weeds after they appear.
Pre-Emergent Over Seeders Versus Clean Lawn Injury
The fork is about what matters more to you. A clean, weed-free Bermuda lawn with no winter color? Use pre-emergent.
A green lawn through the winter? Skip the barrier and accept you’ll be pulling and spraying weeds.
Here’s how the two approaches stack up.
| Approach | Best For | Risk |
|---|---|---|
| Pre-emergent herbicide | Dense, weed-free summer lawn | Blocks any seed germination |
| Post-emergent herbicide | Winter overseeding | More weed pressure in spring |
The mistake we see most often is applying pre-emergent and then overseeding anyway. You end up with a thin, patchy winter lawn and a mess of weeds in spring. Pick one path and commit to it.
Post-Emergent Herbicide Standby
If you skip the pre-emergent, you need to be ready to fight weeds as they grow. Post-emergent sprays work on contact or through the leaves. That means you have to apply them after the weed is already visible.
For common weeds like crabgrass and broadleaf invaders, a targeted spray is effective. Just read the label carefully. Some products are safe for Bermuda, while others can cause damage, especially in the spring green-up phase.
If you’re considering chemical options, research what’s known about herbicide safety on Bermuda before you buy.
The Summer Growth Routine
Once summer heat arrives, Bermuda grass shifts into high gear. This is the season where all your early decisions pay off. The grass is growing fast, recovering quickly, and building density.
Your job now is mowing. Consistently, correctly, and without delay.
Mowing Height, Mowing Frequency
Keep your mower deck set to 1 to 1.5 inches. That low height is what gives Bermuda that carpet-like appearance. If you let it grow to 2.5 inches or more, the lower leaves lose light and the lawn thins out.
Mow often enough that you’re never removing more than a third of the blade at once. In peak summer, that usually means cutting every 4 to 5 days. During a growth surge, you might need to mow twice a week.
Waiting too long between cuts causes scalping. You chop the top off and expose the stems. That’s the quickest way to turn a lush lawn into a brown patch.
The 1/3 Rule Applied
The 1/3 rule is simple. Never cut off more than one third of the leaf blade in a single mowing. So if you’re mowing at 1.5 inches, the grass should be about 2.25 inches tall when you cut.
Grass that shoots past that height needs a gradual reduction. Mow high, wait a few days, then mow again at the lower setting. It takes patience, but it protects the crown and keeps the lawn green.
Following this rule also eliminates the need to bag clippings. When you’re only removing a third of the blade, the clippings are small and break down quickly. They return nitrogen to the soil and feed the lawn for free.
If you’re curious about more advanced lawn care, some homeowners stripe their Bermuda for that sporty, professional look. There are specific techniques for creating lawn patterns that work best when the grass is kept at that low summer height.
Deep Watering Decisions
Bermuda grass is built for drought. It survives on far less water than your cool-season neighbors need. The trick is teaching the roots to grow deep, and that only happens when the soil dries out between waterings.
Keep a simple pattern: water deeply, then wait. A single session should put down 0.5 to 1 inch of water. Then leave it alone for a few days, letting the top inch of soil dry completely.
If you water a little every morning, the roots stay shallow. When summer heat hits, the whole lawn collapses. Deep and rare beats light and frequent, every single time.
USDA extension researchers have documented this root response for decades.
How to Read Leaf Folding and Grayish-Blue Streaks
Your grass talks to you. When blades fold in half and take on a grayish-blue tint, the turf is thirsty. That’s not death.
It’s the Bermuda equivalent of a dry mouth.
If you notice that color in the morning, go ahead and water. The grass should perk back up within a few minutes. If it stays folded after watering, something else is wrong.
Screwdriver Test for Moisture
The screwdriver test is an old standby for a reason. Push a long screwdriver into the soil after watering. It should slide in easily to a depth of 6 inches.
If it stops early, the water didn’t penetrate deep enough.
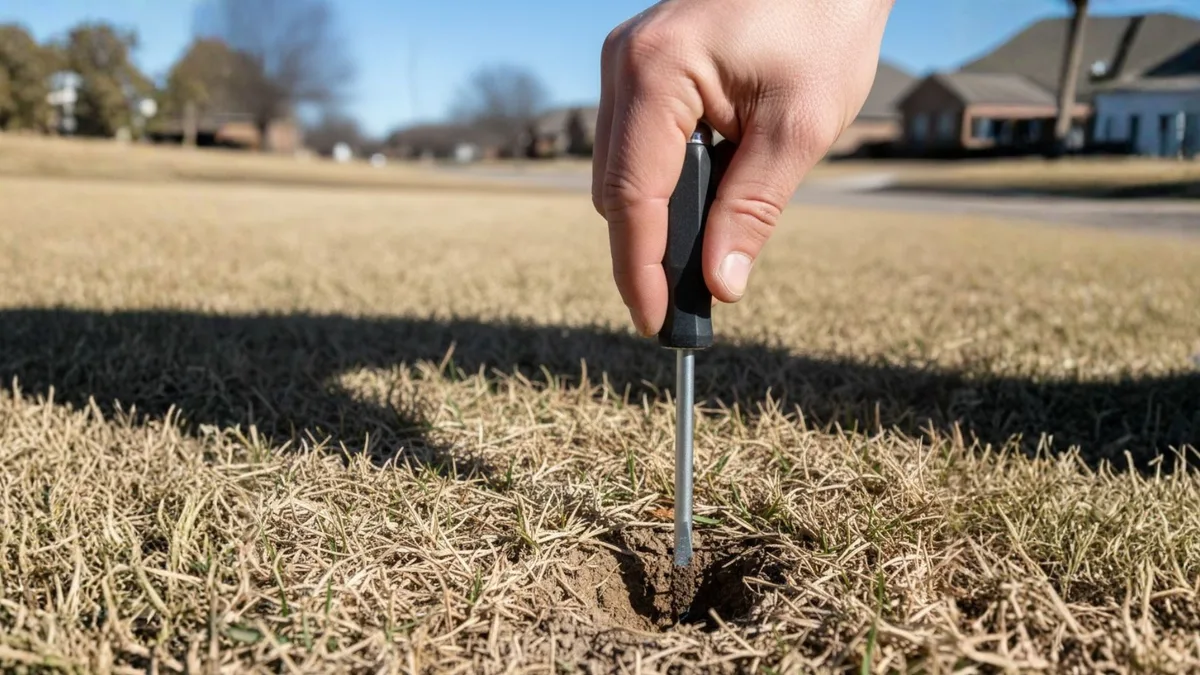

Image source: Web (Bing) / hillandlandscaping.com (Web image (fair-use with source credit))
That simple check prevents overwatering. It also confirms whether your irrigation is actually soaking the root zone. Dry soil, not disease, causes most summer yellowing.
Fertilizer Timing: The Nitrogen Diagram
Feeding Bermuda is about matching nitrogen to the growth phase. Use slow-release nitrogen at spring green-up. Then switch to fast-release during summer.
End the season with a low-nitrogen, high-potassium blend in the fall.
Nitrogen fuels blade growth, but too much too early feeds winter weeds. That’s why getting your feeding schedule right matters more than the exact brand you buy.
| Phase | Timing | Nitrogen Level | Secondary Nutrient |
|---|---|---|---|
| Spring | After 50% green-up | Slow-release, low | Phosphorus for roots |
| Summer | June to August | Fast-release, high | Potassium for heat stress |
| Fall | September | None | Potassium and phosphorus |
Aggregate reviews of lawn forums show that skipping fall potassium is the most common mistake. That nutrient builds carbohydrate reserves and winter hardiness in the crown.
The Fall and Winter Crossroads
When soil temps drop below 65°F, the lawn goes dormant. You get exactly two choices: welcome the brown season or overseed with ryegrass for winter green.
Option A is the low-effort route. Let the grass sleep, rake the leaves, and stop watering entirely. The lawn will reward you with a healthy spring return.
USDA hardiness zone maps show where Bermuda stays reliably perennial, and in those zones, dormancy is completely natural.
Option B is more work but keeps things green for the holidays. The catch is that ryegrass fights Bermuda in April. Knowing how the lawn looks in winter helps you set expectations before you decide.
Either way, consistency wins. Don’t overseed and then ignore the grass until spring.
Dethatching and Aeration: The Overlooked Maintenance Lane
Bermuda creates thatch, plain and simple. Stolons and dead stems build up faster than the breakdown cycle can handle. That spongy layer blocks water and nutrients.
You have two tools to fix it: dethatching and core aeration.
Dethatching uses a power rake or vertical mower. It physically cuts the thatch out of the lawn. Do this in late spring, right after green-up, when the grass is growing fast enough to recover.
Core aeration pulls small plugs of soil out of the ground. This relieves compaction and opens pathways for oxygen and water. The best aeration timing lines up with early summer, when the grass is active and can close the holes quickly.


Image source: Web (Bing) / amazon.com (Web image (fair-use with source credit))
If the lawn feels spongy underfoot, start with dethatching. If the soil is hard and water pools on top, aerate first. When you do both in the same season, wait two weeks between them.
Critical Tools And Specifications
You don’t need a shed full of expensive equipment. Three tools make the difference between guessing and knowing:
- Soil test kit: tells you pH and nutrient gaps. Run it once a year in spring.
- Soil thermometer: confirms when 65°F green-up starts. Check it in the morning at a 2-inch depth.
- Mower with adjustable deck: set it to 1 to 1.5 inches and keep it there.
That’s the entire list. Extra tools just add confusion.
The mower height is the spec that matters most. Manufacturer specifications for most rotary mowers recommend a lower deck setting than homeowners typically use. Adjust accordingly.
Add a good irrigation timer if you have one, but check it regularly. A broken timer that runs every morning will undo all your hard work.
Common Mistakes and Recovery Paths
Two mistakes cause most yellow patches: misreading chinch bugs and overfeeding. Both are easy to fix once you know what to look for.
Chinch Bug Damage vs, Drought Stress
Chinch bugs leave irregular brown patches scattered across the lawn. Drought stress turns the whole turf grayish-blue first, then uniform brown. Pull back the thatch at the edge of a dead patch and look for small dark insects.
If you see them, treat with insecticide. If not, water deeply.
Fertilizer Burn and According Spread
Burn shows up as yellow stripes where granules concentrated on the surface. Water the area lightly to dissolve the salts, then skip feeding for three weeks. Always use a broadcast spreader and follow the label rate.
Aggregate reviews of turf forums confirm that most burn cases trace back to hand-scattering.
Making the Call: Which Decision Tree Fits Your Lawn
The whole routine comes down to a simple decision tree with three branches. Match your current conditions to the right action.
| Condition | Action |
|---|---|
| Soil temp below 55°F | Wait. Do nothing. |
| 50% green-up | Scalp, apply pre-emergent, feed slow-release nitrogen. |
| Full summer heat | Mow low, water deep, keep up the mowing schedule. |
Follow each branch correctly, and the lawn fills in on its own.
Final Decision Guide for Your Yard
If you want a low-drama Bermuda lawn, test the soil once a year. Mow at 1.5 inches max. Water rarely but deep.
That’s the whole game.
Frequently Asked Questions
How often should I water Bermuda grass?
Once per week with 0.5 to 1 inch of water if there’s no rain. Skip the week if the grass doesn’t look thirsty. Overwatering is worse than underwatering.
What is the best height to cut Bermuda grass?
Keep the deck at 1 to 1.5 inches. Remove no more than a third of the blade at once. That keeps the carpet dense and prevents scalping.
Should I let Bermuda grass go dormant in winter?
Yes, unless you want green ryegrass. Dormancy is natural and saves water. If you overseed, skip pre-emergent in spring so the rye dies back naturally.
When should I start mowing Bermuda grass in spring?
Wait until the lawn hits 50% green-up. Then scalp it down to 1 inch. Mowing too early exposes the crown to frost and weakens root recovery.


