
Why Does Kentucky Bluegrass Take So Long to Germinate
Kentucky bluegrass seeds take 14 to 30 days to sprout because they contain germination inhibitors requiring consistent moisture and warmth to break down. This slow start acts as a natural defense, preventing the grass from emerging during brief early spring warm spells. If soil remains dry or temperatures fluctuate, the process stalls until the seed coat softens enough for the embryo to grow.
How Kentucky bluegrass seeds germinate

| Part or input | What it does | What you notice when it goes wrong |
|---|---|---|
| Seed coat | Protects the dormant embryo | Seed remains hard and dry |
| Soil moisture | Softens the tough outer shell | Surface cracks or seed dries out |
| Soil temperature | Triggers internal biological growth | No growth even with water |
| Sunlight | Provides energy for young shoots | Seedlings turn yellow or thin |
| Nutrient levels | Fuels the initial root development | Seedlings stop growing after sprouting |
The seed coat acts as a biological vault. If you find your seeds remain hard after two weeks, the coat is likely too thick to permit water intake.
Soil temperature is the most common point of failure for home gardeners. While moisture is visible, temperature is invisible. If the soil stays below 50 degrees Fahrenheit, most vegetable seeds remain in a state of permanent suspended animation. Use a soil thermometer designed for gardening to confirm you have hit the target range before planting.
Many people make the mistake of over-fertilizing at the start. If you add nitrogen-rich fertilizer before the first true leaves appear, you risk burning the delicate root hairs. Wait until the seedling has established at least two sets of leaves before applying any liquid feed.
If the leaves look scorched or brown at the edges, flush the soil with water immediately to dilute the salt concentration. Always match your variety to the specific soil temperature requirements provided by your local university extension office.
Steps for successful seed growth
Prepare the soil by removing rocks, sticks, and thatch. Loosen the top 2 inches of dirt with a rake to ensure the seed makes direct contact with the ground. If you skip this step, seeds will sit on the surface and perish before they can anchor.
Spread the seeds evenly using a broadcast spreader at the rate suggested on the bag, typically 2 to 3 pounds per 1,000 square feet for new lawns. Over-seeding leads to crowded, weak grass that competes for nutrients, while under-seeding leaves gaps for weeds to take hold.
Cover the seeds with a very thin layer of compost or straw, no thicker than 1/8 inch. This layer prevents erosion from wind and keeps the seeds from drying out. If you bury them deeper than 1/4 inch, the seedlings will likely run out of energy before reaching the surface.
Water the area lightly but frequently. Aim to keep the top inch of soil damp without creating puddles, which usually requires watering two or three times daily.
Maintain this moisture level for at least 21 days. Even one full day of total dryness can kill a seed that has already begun to swell. If the soil surface turns light brown or dusty, you have waited too long to irrigate.
Reduce the frequency of watering once you see green shoots emerging. Move to a deeper soaking every few days to encourage the roots to grow down.
Why germination stalls in your yard

The primary reason for failure is inconsistent moisture during the critical three-week window when the seed is absorbing water. If the soil surface dries out for even a few hours during a hot afternoon, the biological process inside the seed stops.
Unlike faster-growing grass types, this species doesn’t have a “resume” button; if it dries out after starting to swell, the embryo often dies. This is a common mistake that costs homeowners the entire bag of seed and their initial labor.
Aim for a light, frequent misting rather than a heavy soaking. If you see puddles forming, you’re overwatering and risking seed displacement. If the top quarter-inch of soil turns light gray or dusty, you have already waited too long to irrigate.
Temperature plays an equally large role in the timing of emergence. Kentucky bluegrass prefers soil temperatures between 60 and 75 degrees Fahrenheit. If you plant when the ground is too cold, the seed will sit dormant for weeks, effectively waiting for the weather to stabilize. Planting too late in the spring causes the seeds to face the heat of early summer before they have established deep roots, leading to failure.
Soil contact is another frequent cause of slow or patchy growth. If the seeds are sitting on top of hard, compacted dirt, they can’t pull enough moisture into their shells to trigger growth. They might sprout if it rains heavily, but they will likely die shortly after because their roots can’t penetrate the surface.
You must ensure the seed is tucked slightly into the soil. Use a lawn roller or a garden rake to press the seed into the top eighth-inch of soil.
Finally, the age of the seed matters significantly for the speed of emergence. Old seeds that have been sitting in a garage or shed for more than a year lose their viability and vigor. If you’re using leftover seed, you should expect a much lower percentage of the seeds to sprout at all. Always check the “packed for” date on the bottom of the bag to ensure you’re starting with fresh material.
Control and design factors
What you can control
- Soil moisture levels through daily light irrigation.
- The depth of the seed placement in the soil.
- The timing of your planting based on local weather.
- The quality and age of the seed you purchase.
What is fixed by design
- The biological dormancy period of the seed coat.
- The temperature range required for active growth.
- The genetic speed at which the roots develop.
If you’re struggling with large, bare patches or persistent soil erosion, you should consult a professional landscaper, as these issues often require soil testing or grading that goes beyond standard seeding practices.
Habits for better lawn results
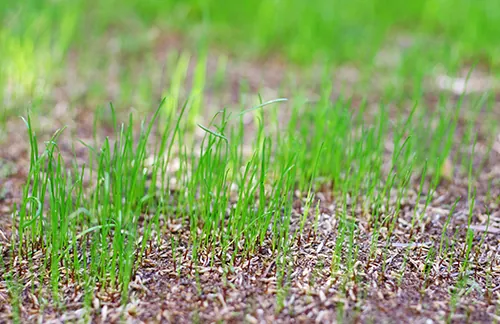
Consistent hydration is the most important habit for this grass. Because the seeds take so long to wake up, you must treat the surface like a sponge that never dries out. If you live in an area with high winds or low humidity, consider using a light layer of mulch to hold that moisture in place for longer periods.
Monitoring the soil temperature is your best tool for timing. Use a soil thermometer designed for gardening to check the heat. If the reading is below 55 degrees, wait until the weather warms up, as the seed will simply sit there and potentially rot if the soil stays cold and wet for too long.
Avoid walking on the area you have just seeded. Every footprint compresses the soil and pushes the seeds deeper or into clumps, which prevents even germination. If you must cross the area, lay down a flat board to distribute your weight.
Most beginners fail by watering too heavily once a day. Instead, mist the soil three times daily for five minutes each. This keeps the surface damp without creating the puddles that wash seeds away.
Finally, be patient with the growth phase. Many people mistake the slow start for a total failure and end up tilling the ground or adding more seed too early. If you have kept the soil damp for 30 days and see nothing, check your seed bag for the germination rate. This percentage tells you what to expect; if the rate is 85 percent, don’t panic if some patches remain bare. Wait until the 45-day mark before overseeding those thin spots.
Frequently asked questions
Can I speed up the germination process?
You can’t force the seeds to grow faster than their biological limit, but you can ensure they start on time by soaking them in water for 24 hours before planting. This process, known as priming, softens the outer hull so the seed is ready to absorb moisture immediately upon hitting the soil. Only do this if you plan to plant the damp seeds within a few hours to prevent them from rotting.
How long does it take for the grass to fully establish?
Full establishment of a new lawn typically takes one full growing season, or about 3 to 4 months of consistent care. While the seeds sprout in 14 to 30 days, the young grass remains very fragile and requires regular watering to survive the first summer. You should avoid heavy foot traffic or mowing until the grass reaches a height of at least 3 inches, which usually happens by mid-summer.
Is it safe to use fertilizer at the same time?
It’s safe to use a starter fertilizer at the time of planting, provided it’s labeled for new grass and used at the specific rate on the package. These products are formulated with higher phosphorus levels to encourage root growth without burning the tender new shoots. Using a standard lawn fertilizer with high nitrogen can actually harm the seeds by encouraging fast top growth before the roots are ready.
What happens if it rains heavily after I seed?
Heavy rain often washes the seeds into low spots, leaving your lawn looking patchy once the grass finally emerges. If you see pools of water forming, the seeds are likely being displaced. You can minimize this by using a straw or fiber mat to hold the soil in place. If the seeds have washed away, you’ll need to rake the area gently and re-seed those specific spots.
Does the type of soil matter?
The soil type decides how often you need to water, as sandy soils drain much faster than clay-heavy soils. You need to check the moisture level by touching the dirt; if it feels dry to the touch, it’s too dry for the seed. In sandy areas, you may need to water three or four times per day to keep the surface damp, while clay soils might only need two sessions.
Why is my grass growing in patches?
Patchy growth usually happens because the soil surface wasn’t level or the seeds were spread unevenly by hand. If some areas are higher than others, the high spots dry out faster and the seeds fail to sprout. Use a mechanical spreader rather than hand-tossing to get the most even distribution. You can also fix this by adding a light top-dressing of compost to fill in the low spots and retain water.
Conclusion
Patience is your best tool while waiting for those tiny green shoots to appear. Keep the soil surface consistently damp, but don’t let it become soggy. Once the blades finally push through the dirt, you’ll be rewarded with a lush, thick lawn that’s well worth the wait. You’ve got this!