How to Change a Lawn Mower Tire: My Proven Method
You roll the mower out for the first cut of spring and find a flat. If you’re wondering how to change a lawn mower tire without paying a shop $50 or more, you’re in the right place. Nearly every riding mower owner hits this eventually, and it’s an easier fix than it looks.
Manufacturer specifications indicate most lawn tractor tires run 10 to 14 PSI, a fraction of what a car tire carries. Low pressure and small rims change how the bead behaves, so technique matters as much as tools. Let’s start with what you’re actually dealing with.
How to Change a Lawn Mower Tire
Knowing how to change a lawn mower tire saves a $50 shop fee. Jack up the mower and pull the wheel. Break both tire beads loose from the rim with tire spoons.
Fit the new tire or tube over the rim. Inflate until both beads snap into place, then reinstall the wheel.
What You’re Getting Into: The Honest Version of This Job
Here’s the straight talk before any tools come out. Mechanically, this job is simple. A tire is rubber looped over a metal rim, and your whole task is getting one off and another on.
What makes it hard is one small part called the bead.
The bead is the steel-cored inner edge of the tire. It hooks under a lip on the rim and locks tight when inflated. New tires fight you because the rubber has never flexed.
Old tires fight worse because moisture rusts the bead to the rim over the years.
In our research across repair forums and small-engine shop accounts, a rust-welded bead is the top reason first-timers quit halfway through. So here’s the honest if/then breakdown.
- If the tire went flat this week, expect a routine 30-minute job.
- If it’s been flat since last season and parked on bare ground, expect rust at the bead line and extra patience.
- If the rim flange is bent or deeply pitted, a new tire alone won’t seal no matter how good your technique is.
There’s also an exit ramp worth knowing about. Complete wheel assemblies (tire already mounted on the rim) run $25 to $60 for common sizes. Plenty of owners skip the bead fight entirely, swap the whole wheel, and get on with their Saturday.
We’ll run that cost math later.
On time, expect 20 to 40 minutes per wheel once you’ve done one. Your first attempt will run closer to two hours, and that’s normal. The skill transfers, too.
The same technique handles wheelbarrow tires, garden carts, and snow blower tires with almost no changes.
One last thing: pictures carry half the weight on this job. Watch where the spoons sit and where the bead goes in the images ahead, because that’s the part words struggle to explain.
Know Your Setup Before You Start: Tubeless vs Tube-Type, Tire Sizes, and Rim Anatomy
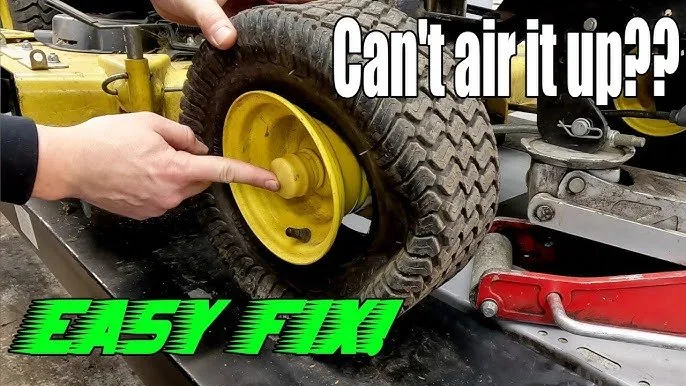
Image source: Web (Bing) / plantandlights.com
Before anything comes off, figure out what you own. Riding mowers use two tire designs, and they fail in different ways.
Tubeless tires hold air between the tire and rim directly, with no liner inside. Most modern lawn tractors run these. Tube-type tires carry a separate rubber inner tube inside the casing, which is common on older machines and many small wheels.
The only reliable way to tell is after the bead breaks. If a tube slides out, you’ve got a tube-type wheel, and that adds a pinch hazard you’ll need to respect during reassembly.
Now read the sidewall. You’ll find a stamping like 15×6.00-6, and decoding it takes five seconds. The first number is the tire’s overall diameter in inches.
The middle number is its width. The number after the dash is the rim diameter, so that example is a 15-inch tire, 6 inches wide, on a 6-inch rim. Every replacement tire, tube, and rim spec keys off those three numbers.
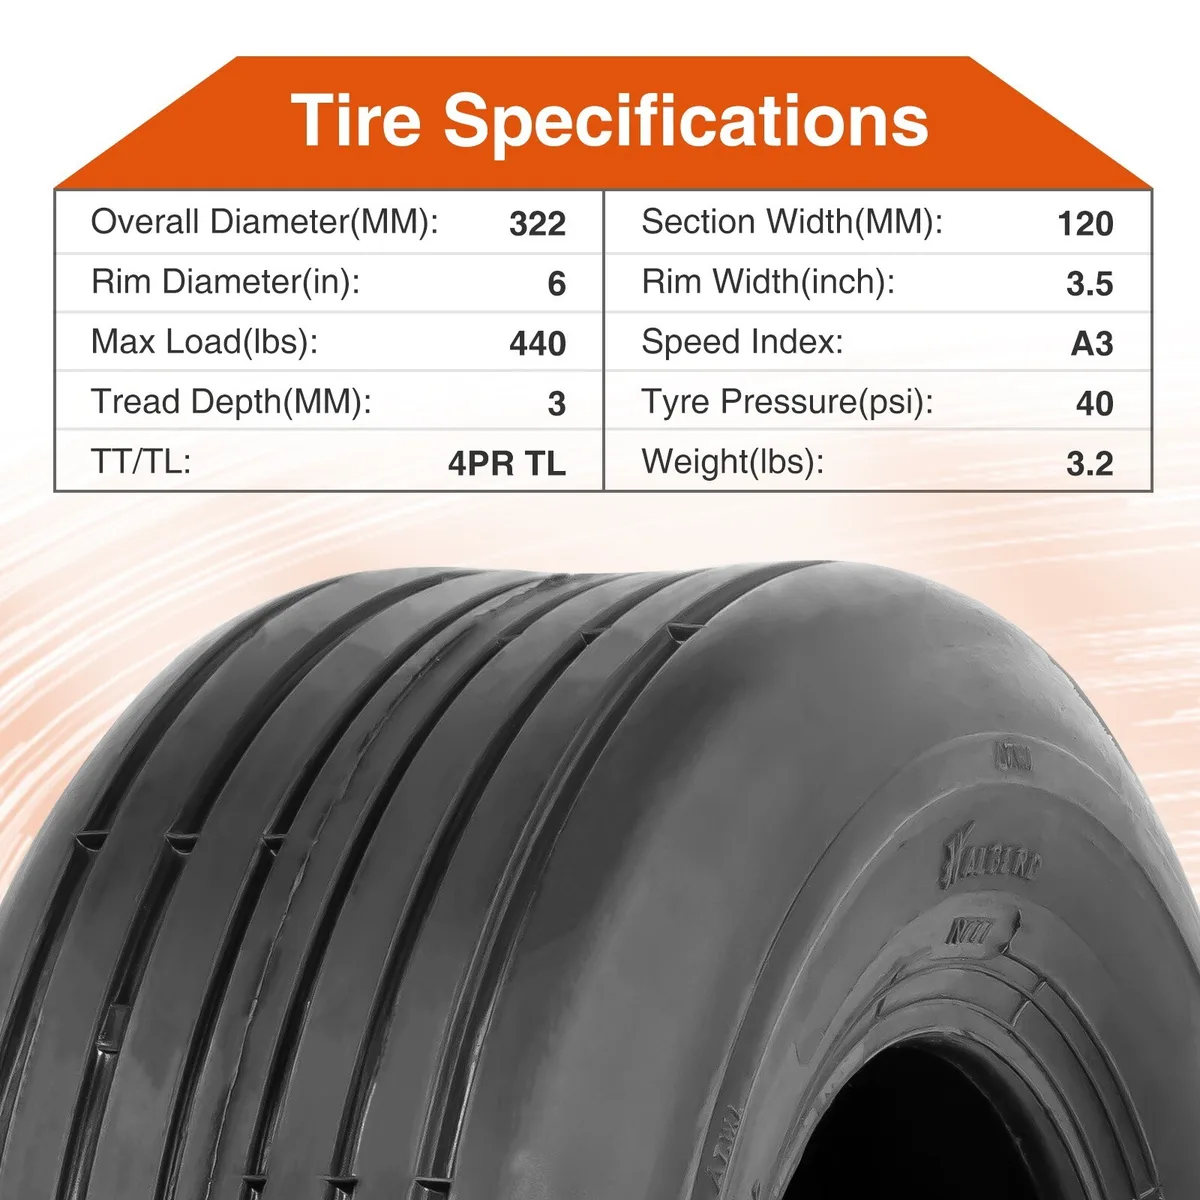
Image source: Web (Bing) / ebay.com
| Tire size | Where you’ll see it |
|---|---|
| 15×6.00-6 | Front tires on most lawn and garden tractors |
| 13×5.00-6 | Front tires on smaller tractors and rear-engine riders |
| 20×8.00-8 | Rear tires on standard lawn tractors |
| 18×9.50-8 | Rear tires on mid-size tractors |
| 24×12.00-12 | Rear tires on heavy garden tractors |
| 11×4.00-5 | Front caster wheels on zero-turn mowers |
Turf tire standards from manufacturers like Carlstar, the company behind the classic Carlisle turf line, have kept these dimensions stable for decades. That’s good news for you. Replacement stock for sizes like 15×6.00-6 sits on shelves just about everywhere.
The 11×4.00-5 size belongs to the caster wheels on mowers that steer by pivoting, and those thin front tires puncture more often than anything else on the machine.
Next, learn the rim’s four landmarks, because every instruction from here on references them.
- Bead seat: the flat ledge where the tire seals against the rim.
- Flange: the raised lip that keeps the bead from sliding off outward.
- Drop center: the recessed channel in the middle of the rim.
- Valve stem hole: where the stem pokes through the rim.
Here’s why the drop center matters most. When you push the bead down into that recess, the tire’s effective diameter shrinks and the rubber goes slack. That slack is what lets a spoon lift the bead over the flange without a fight.
Skip that step and you’re prying against a stretched tire, which is exactly how rims get scarred.
The Tools and Parts That Actually Matter (and What Each One Looks Like)
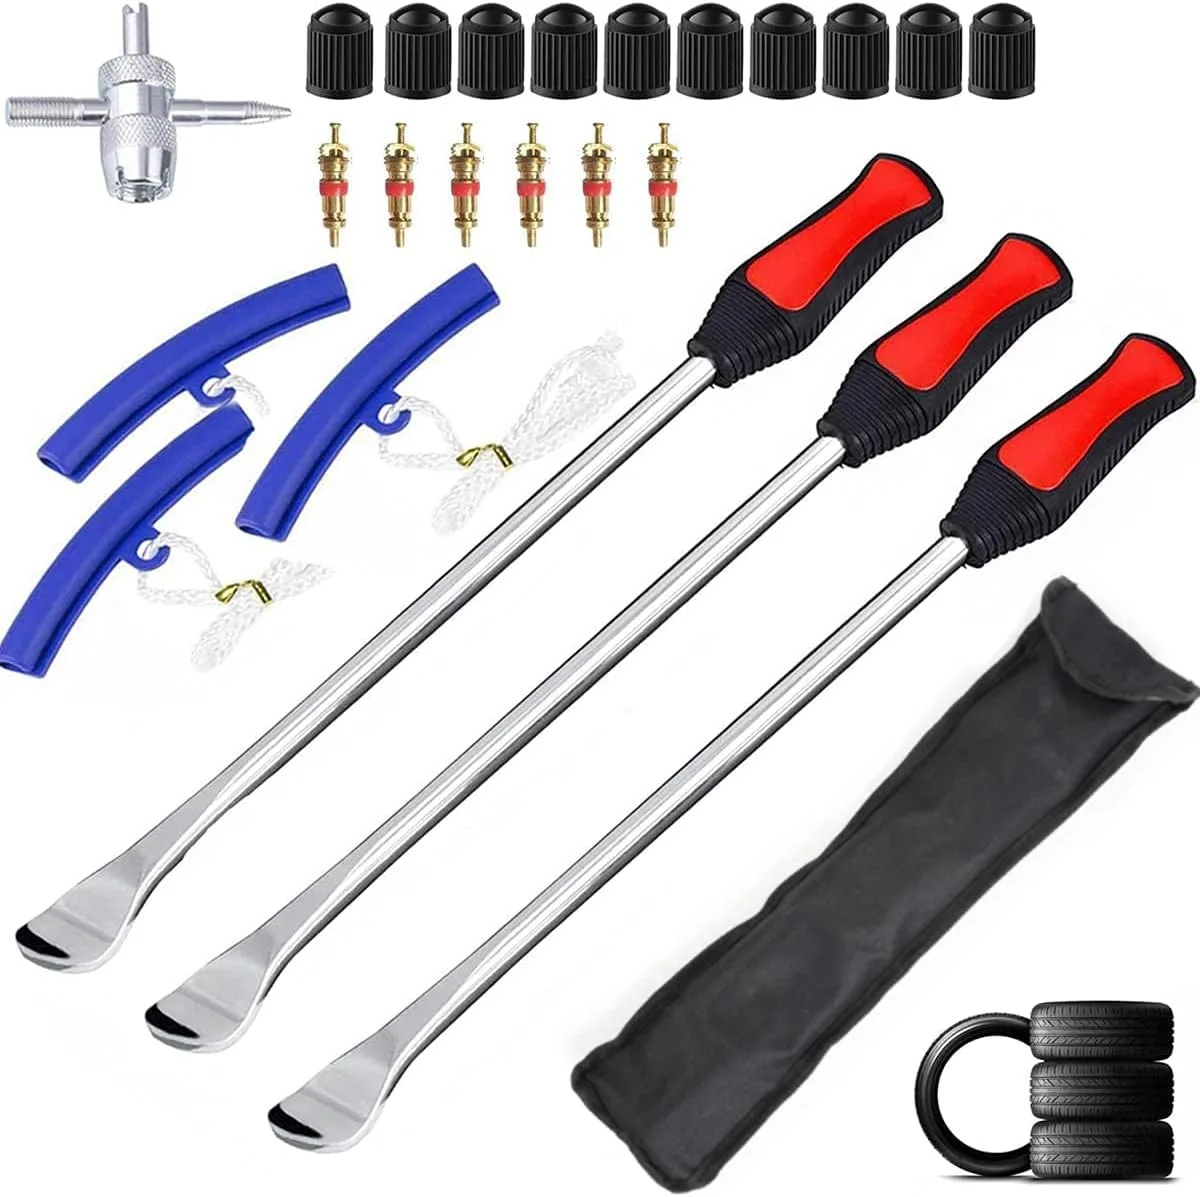
Image source: Web (Bing) / amazon.ca
You don’t need a professional tire machine. You need a short list of hand tools, one improvised trick, and a compressor that can move air fast.
| Tool or part | What it does | Typical cost |
|---|---|---|
| Tire spoon set | Levers the bead over the rim without damage | $15-$30 |
| Bench vise (or C-clamp) | Squeezes the sidewall to break the bead | Usually owned |
| Valve core remover | Dumps air fast for clean bead work | $3-$8 |
| Ratchet strap | Forces both beads outward while seating | $10-$20 |
| Inner tube with TR-13 stem | Fixes tube-type wheels and chronic tubeless leakers | $8-$15 |
| Soapy water in a spray bottle | Bead lube and leak detector | Pennies |
| Air compressor | Seats beads, which needs fast, sustained airflow | Usually owned |
| Wire brush and a file | Cleans rust and burrs off the bead seat | $5-$10 |
| $5-$10 |
Two cautions from the garage. Skip the screwdriver shortcut. A big flathead scars the rim flange and tears a bead faster than anything, which turns a $12 fix into a $40 wheel assembly.
Also, be honest about your air supply. Seating a bead takes a fast burst of volume, not a slow trickle. Hand pumps and bicycle pumps almost never get there.
A basic pancake compressor will.
Round out the kit with what’s already in the garage: a socket wrench for lug nuts, pliers for the retaining ring, a scrap block of wood, and a dead-blow hammer for stubborn beads. Prices above are typical online retail as of 2026.
Find the Leak First: Fixing the Wrong Thing Wastes the Whole Job
Spray soapy water over the inflated tire and watch for bubbles. That one test tells you where the air is going and what actually needs fixing. Air up a tire with a torn valve stem, mount a brand-new tire anyway, and you’ll be flat again by the weekend.
Three zones cause nearly every leak:
- Valve stem: bubbles at the base or through the core mean a bad stem or loose core. A new core costs $3, a new TR-13 stem about $10.
- Bead line: a ring of bubbles where tire meets rim means rust, pitting, or a bent flange. Cleaning and reseating fixes mild cases, an inner tube fixes stubborn ones.
- Tread: bubbles mid-tread mean a puncture. Tubes get patched, tubeless tires get plugged or replaced.
If the leak sits at the bead and the rim looks crusty, expect extra fight at step 2. That same rust is what welded the bead on in the first place. Storage habits drive this more than people realize.
A mower parked on a dirt shed floor all winter collects moisture right at the bead line, which is how next spring’s slow leak gets born. Ready the machine for winter storage properly and you prevent half of these leaks before they exist.
If a tube is already out, inflate it until it just holds shape and dunk it in a bucket. A stream of bubbles marks the hole in seconds. Mark it, dry it, patch it.
| Leak location | Likely cause | Typical fix |
|---|---|---|
| Valve stem base | Aged, cracked rubber stem | New TR-13 stem, $3-$10 |
| Valve core | Loose or dirty core | Tighten or swap the core, $3 |
| Bead line | Rust, pitting, bent flange | Clean and reseat, or add a tube |
| Tread center | Nail, thorn, pinch flat | Patch tube, or plug and replace tubeless |
Tuck this check into your seasonal service routine so slow leaks surface before they strand you. The soap test also scales down to everything with small pneumatic wheels, from a garden tractor to a self-propelled walk-behind’s little 8-inch tires.
The Complete Walkthrough: Wheel Off to Bead Seated
Here’s the whole job in order. The bead steps are where photos earn their keep, so watch tool placement closely there.
Step 1: Get the Wheel Off the Mower Safely
Park on level pavement, chock the wheels staying on the ground, and set the brake. Shut the machine down using the proper safety steps rather than letting it idle while you work around it. Pull the spark plug wire last so the engine can’t crank with your hands in the work zone.
Jack under the frame, never under the axle you’re removing. Set a block or stand under the frame once it’s up.
Wheel attachment varies by brand, so look before you pull:
- Retainer ring: pry the clip off the axle with a flathead, then slide the wheel free.
- Lug nuts: four nuts on most tractors, start them by hand on the way back.
- Keyed hub: note any square key sitting in the axle slot so it doesn’t vanish.
Step 2: Break the Bead (Where Most People Get Stuck)
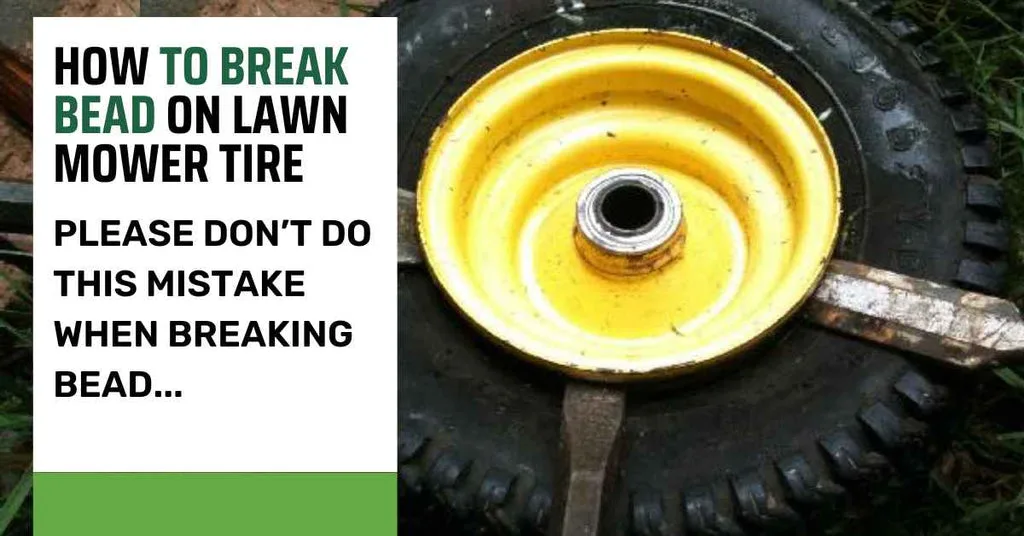
Image source: Bing (Web (fair-use with source credit))
Pull the valve core and let every bit of air out first. A tire holding even 5 PSI will fight the breaker the whole way.
The vise method is cleanest. Squeeze the sidewall toward the center until the bead pops off its seat, then rotate and repeat on the other side. Never clamp the metal rim itself.
No vise? Lay the wheel flat, set a wood block on the sidewall just off the rim, and drive the bead down with a dead-blow hammer or your body weight. You’ll hear a distinct pop when each bead lets go.
Step 3: Spoon the Tire Off and Inspect the Rim
Push the bottom bead into the drop center to create slack. Slide a spoon under the top bead near the valve stem and lever it up over the flange. Keep the spoon roughly perpendicular to the rim and work in thirds around the wheel instead of attempting one giant lift.
Three levers spaced around the rim beat one hero lever every time.
Tube-type wheels need one extra move. Pull the tube out, inflate it slightly, and dunk it to find the puncture. Guard the tube with the spoon tip the whole time, because a pinched tube is a ruined tube.
Now clean the rim. Wire-brush the bead seat until it’s bright, file off any burrs, and sight down the flange for bends. A pitted seat leaks forever even under a perfect new tire, so these five minutes decide whether the job lasts.
If the rim is bent beyond saving, a fresh wheel assembly costs less than the fight. And if the machine itself is done, get rid of the old mower properly instead of letting it rust by the fence.
Step 4: Install the New Tube or Tire
Lube both beads generously with soapy water. Then split by type:
- Tube-type: put a little air in the new tube until it just holds shape. Feed the stem through the rim hole, seat its base, and lay the tube around the rim without twists. Start the bead opposite the stem and spoon around in thirds.
- Tubeless: hook one bead over the flange opposite the stem hole, then lever the rest around. Push the opposite side into the drop center whenever the lever fights back.
Keep checking that the tube stays centered as the bead creeps in. A trapped fold shows up as an instant flat the first time you air it up.
Step 5: Seat the Bead and Inflate to Spec
This is the part that feels like magic the first time. Wrap a ratchet strap around the tread center and ratchet it down until both beads bulge outward against the flanges. Connect the air and fill fast.
You’ll hear two sharp pops as the beads snap home.
Pull the strap, then set the pressure to the number molded on the sidewall, typically 10 to 14 PSI on tractor tires. Never exceed the sidewall max to force a stubborn seat. Bounce the wheel on the ground, soap-spray the bead lines for stray bubbles, and reinstall the retainer ring or lug nuts plus the dust cap.
Recheck the pressure after an hour of sitting. A slow droop at that point points back to the bead seat or stem, not the tire. Reconnect the plug wire and you’re back in business.
The Mistakes That Turn a 30-Minute Job Into a Lost Weekend
Nearly every stalled tire job traces back to the same short list of errors. We’ve watched these patterns repeat across owner forums and shop accounts, so here’s each mistake paired with its fix.
-
Levering against a stretched bead. If the lever fights you on every inch, the opposite bead never went into the drop center. Push it down first, then work in thirds. A diagram would show the spoon sitting close to 90 degrees to the rim with the far bead parked in the recess.
-
Going for one giant lift. A single deep lever bends the bead wire or snaps the spoon. Three small bites around the wheel beat one hero move every time.
-
Pinching the new tube. You mount everything, inflate, and hear an instant hiss. That’s a fold caught between spoon and rim. Half-inflate the tube, feed the stem through first, and keep spoon tips shallow.
-
Losing the square key. Keyed hubs carry a small square key in the axle slot. Miss it and the wheel spins without driving. Tape the key to the axle the moment the wheel comes off.
-
Mounting over a dirty bead seat. New tire, same slow leak. Wire-brush the seat bright and file every burr before the rubber goes on.
-
Skipping the escalation plan on a rusted bead. If the vise won’t pop it, drip penetrating oil at the bead line, wait ten minutes, and try the block method. If that fails, order the wheel assembly and reclaim your weekend. Clean the seat thoroughly afterward, because oil kills the seal.
-
Forcing the seat with pressure. Past the sidewall max, the bead blows past the flange or the tube bursts. The strap trick moves beads, extra PSI doesn’t.
-
Creasing the valve stem. A stem cut against the rim edge looks exactly like a bead leak later. Seat it square and never lever close to the hole.
If three things go sideways in a row, stop. Nine times out of ten, you skipped the slack step back at the drop center.
Repair or Replace? Tubes, Tires, and Full Wheel Assembly Costs
Patch what’s punctured, replace what’s rotted, and swap the whole wheel when the rim itself is the problem. Run your situation through these branches:
- If you found one clean puncture in a healthy tube, patch it. A kit costs $2 to $5 and takes 15 minutes.
- If the tube has multiple holes, creases, or that cracked dry-rot texture, buy a new tube. Old rubber tends to split at the next flex point, usually mid-season.
- If a tubeless tire took a small tread puncture, most shops replace rather than plug at these sizes. A new turf tire runs $15 to $40.
- If the leak traces to the bead and wire-brushing didn’t stop it, install an inner tube in the tubeless wheel. That’s the standard fix for a pitted rim, around $10 to $15.
- If the flange is bent or the bead is rust-welded past the vise stage, order the full wheel assembly. $25 to $60 and 15 minutes of your time.
| Option | Typical cost | Time | Best for |
|---|---|---|---|
| Tube patch kit | $2-$5 | 15 min | One clean puncture, tube otherwise healthy |
| New inner tube | $8-$15 | 30-45 min | Rotted or multi-hole tubes, chronic bead leaks |
| New tubeless tire | $15-$40 | 45-60 min | Cracked sidewalls, worn or rotted tread |
| Full wheel assembly | $25-$60 | 10-15 min | Bent rims, welded beads, no compressor on hand |
| Repair shop | $40-$80 | Days | No tools or air supply at all |
Each route suits a different owner. Commercial crews stock complete assemblies and swap rather than repair, because downtime is the expensive part. Homeowners with a sound rim get the cheapest outcome from a tube or tire.
First-timers without a compressor should lean toward the assembly.
One check before ordering an aftermarket assembly: match the hub bore, the keyway slot, and the valve stem position to your original wheel. Tire sizes are standardized, but hub details vary by brand.
A word on sealant. It seals pinhole tread leaks for a season, though it’s a stopgap, and dried sealant makes the next tire change messier.
And when a mower’s not worth another repair, scrap the old machine the right way instead of letting it leak oil in the shed.
Safety Rules That Aren’t Optional
None of these are exotic. Each one exists because somebody skipped it and got hurt.
- Kill the crank risk. Set the brake and pull the spark plug wire before anything touches the wheel. If you’re unsure of the correct shutdown sequence, our guide to shutting the engine down properly walks through every step.
- Support the machine for real. Jack under the frame, then set a stand or block. Hydraulic jacks creep, and nobody needs 400 pounds settling on a leg.
- Respect stored pressure. A bead that lets go during inflation throws the rim and tire with real force, and OSHA flags tire servicing as a recognized injury source. Keep your face and hands out of the wheel’s plane while it’s airing up.
- Never exceed the sidewall max to force a seat. If the beads won’t pop at spec, the strap moves them, not more PSI.
- Skip the ether trick entirely. Truck-tire videos use flammable gas and a spark to pop beads. On a small wheel, near plastic shrouds and a fuel tank, that’s an explosion, not a technique.
- Wear glasses from bead breaking onward. Rust scale and old rubber chip.
- Glove up around an old flange. Corroded rims grow burrs that cut like paper.
One habit worth borrowing from commercial crews: spin the wheel by hand after remounting and listen before driving. A rubbing sound means a pinched tube or misaligned stem, and that’s easier to fix at the stand than under load.
Lawn Mower Tire FAQs
Short answers to the questions riders ask most.
How long does it take to change a lawn mower tire?
Plan on one to two hours your first time, bead fight included. After that, most wheels take 20 to 40 minutes. Swapping a complete wheel assembly drops it to 15 minutes, which is why stocked crews love that route.
How much does it cost to change a lawn mower tire?
DIY runs $8 to $15 for a tube, $15 to $40 for a tire, or $25 to $60 for a full assembly. Shop service typically bills $40 to $80 per wheel. Tool costs are one-time, roughly $25 to $60 if you’re starting from an empty pegboard.
Why does my lawn mower tire keep going flat?
Four suspects cover most repeats: bead-line rust, a leaking valve stem, a slow tread puncture, or a cracked rim. The soap test pinpoints which one you’ve got. Storage matters too, so putting the mower away properly for winter keeps moisture from welding the bead to the rim.
Can you put a tube in a tubeless lawn mower tire?
Yes, and it’s the standard fix for a rim that won’t seal. Match the tube to the tire size and use one with a TR-13 stem for mower rims. Break both beads, drop the tube in, and it becomes a tube-type wheel.
What pressure should lawn mower tires run?
The sidewall is the authority. Most tractor tires run 10 to 14 PSI, some garden-tractor rears spec higher, and zero-turn caster wheels often run firmer than tractor rears. Check monthly, since low pressure flexes sidewalls until they crack.
The easiest way to never skip it is folding the check into a seasonal service routine.
Can I ride my mower with a flat tire to the shop?
Don’t. Even a short roll crushes the sidewall, unseats the bead, and can scar the rim, turning a $15 fix into a $60 one. Move the mower on a trailer or jack up that corner and fix it where it sits.