How to Prepare Soil for Perennial Ryegrass: A Smart Start
Getting soil ready for perennial ryegrass isn’t complicated, but it is unforgiving. You can follow every step for how to prepare soil for perennial ryegrass and still watch a thin, patchy stand come up because the bed was loose, too wet, or sitting at the wrong pH. Ryegrass germinates fast, which sounds like a gift.
It also means your mistakes show up within a week instead of a month.
The target most extension guides work from is a firm, crumbly seedbed at pH 6.0 to 6.5, with seed placed no deeper than a quarter inch. Miss those three and no amount of extra seed will rescue the job. Get them right and the rest is just scheduling.
Here’s how the prep actually branches.
How to Prepare Soil for Perennial Ryegrass
Test the soil first and fix pH before you till. Aim for 6.0 to 6.5, then loosen the top six inches. Clear debris and existing turf, then level the surface.
Firm the bed until footprints barely sink in. Sow seed a quarter inch deep and keep the top inch moist.
Why Ryegrass Seedings Fail Before the Seed Even Sprouts
Most failed ryegrass lawns aren’t seed failures. They’re seedbed failures, and the damage happens in the ten quiet days before anything green appears.
Ryegrass seed is tiny. Each one carries just enough energy to push a shoot a quarter inch up to the light. If that quarter inch is loose, dry, or full of clods, the seedling stalls and dies.
Fertilizer won’t rescue it, and neither will a second seeding pass.
In our research across university turf guides, four prep faults come up again and again:
- Fluffy, over-tilled soil that dries out below the surface
- Seed buried deeper than a quarter inch
- Thatch or dead grass blocking seed-to-soil contact
- Herbicide residue from a pre-emergent applied too recently
That last one catches people out. A pre-emergent that worked perfectly on an established lawn can wipe out new seedlings for weeks. Planting depth trips up plenty of DIYers too, so it’s worth sorting out the right sowing depth before you open a bag.
There’s a simple firmness test. Walk across the finished bed. Your footprints should sink in barely a quarter inch.
If you leave deep ruts, the soil is still too loose. Water it, roll it, and wait a few days before seeding.
The Three Variables That Decide Your Entire Prep Plan
Three things change the plan more than anything else. Answer them honestly before you touch a tool.
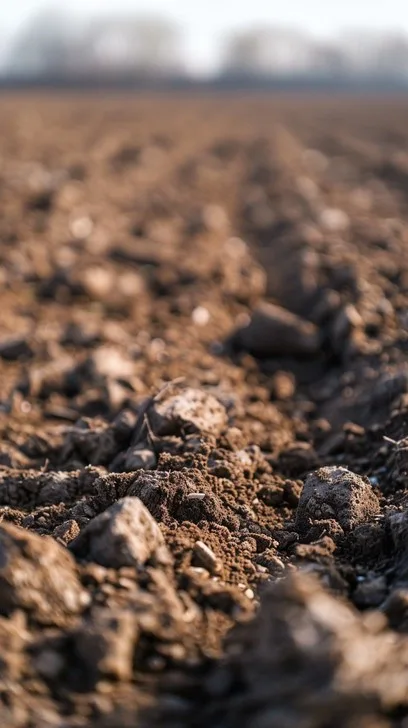
Image source: Web (Bing) / stockcake.com
Project type: bare ground, overseed, or pasture
If you’re starting from bare soil, you till, amend, and grade. If you’re thickening an existing lawn, you aerate and slit-seed instead. If it’s pasture, you drill into what’s already growing.
Each route uses different equipment and a different seed rate, so pick your lane first.
Soil texture: sand, loam, or clay
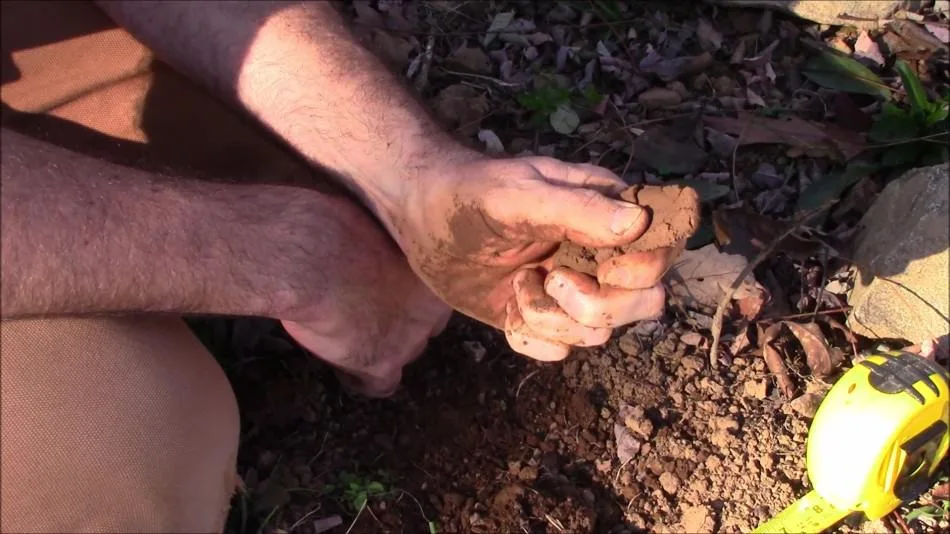
Image source: Web (Bing) / growitbuildit.com
Sandy ground drains fast and dries out before seedlings can root. Clay holds water, compacts easily, and smears if you till it wet. Loam sits in the middle and needs the least correction.
A jar test or a squeeze test tells you which one you’ve got in about ten minutes. If you’re working with thin, sandy ground, plan on extra compost and shorter, more frequent irrigation.
Drainage and compaction
Dig a hole a foot deep, fill it with water, and time how long it takes to disappear. Standing water after 24 hours means you fix drainage before you seed anything. Compacted subsoil is the usual culprit, and it’s the one problem topdressing never solves.
Reading the Ground: Soil Test, pH, Phosphorus, and Compaction
A soil test is the cheapest part of the job and the one most people skip. A basic lab test runs about $15 to $30 and reports pH, phosphorus, potassium, and often organic matter.
What to test and which numbers actually change your plan
pH is the number that matters most. Below 5.8, phosphorus locks up and ryegrass struggles to tiller. Above 7.0, you start losing iron and manganese.
Phosphorus and potassium levels decide your starter fertilizer. Cation exchange capacity and organic matter tell you how much water and nutrient the soil can hold between feedings.
Lime, sulfur, and gypsum, three different jobs
These get lumped together constantly. They aren’t interchangeable.
| Product | What it does | When you need it |
|---|---|---|
| Lime | Raises pH | Test shows below 6.0 |
| Elemental sulfur | Lowers pH | Test shows above 7.0 |
| Gypsum | Adds calcium, improves sodic clay structure | Sodium problems, not pH |
Gypsum gets sold as a cure-all. It won’t shift pH, and it won’t fix compaction caused by traffic or tilling wet.
Fixing a hardpan without making it worse
If a shovel won’t go in, or water pools in the same spot every time, you may have a plow pan. Deep tillage to six or eight inches breaks it up, but only when the soil is dry enough to shatter rather than smear. Tilling wet clay makes the layer worse, and it takes years to undo.
The NRCS soil survey will tell you what you’re working with before you start.
Three Prep Workflows, One for Each Starting Point
Bare ground and full renovation: kill, deep-till, grade, firm
- Kill existing vegetation with a burndown, then wait 10 to 14 days. Or strip sod and roots physically.
- Till six to eight inches deep, but only when the soil crumbles instead of balling up.
- Spread lime, phosphorus, and compost, then till them into the top four inches.
- Rake to final grade, sloping away from the house at about an inch per foot.
- Water, roll, and let the bed settle for three to seven days.
- Scratch the top two inches loose right before seeding.
Overseeding into thin turf: aerate, dethatch, slit-seed
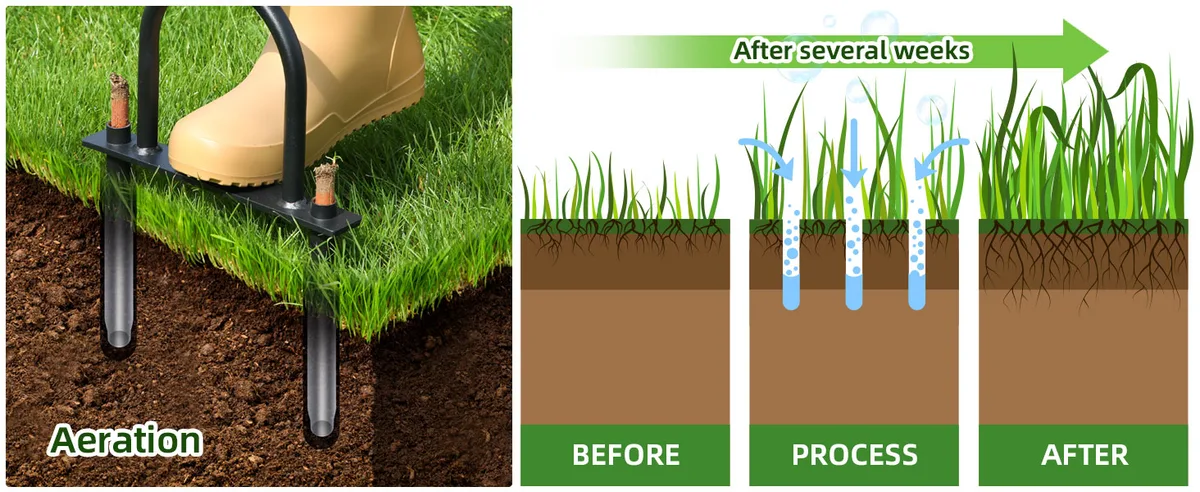
Image source: Web (Bing) / storage.googleapis.com
Run a core aerator over the lawn in two directions and pull cores every two to three inches. Dethatch if the layer is thicker than half an inch. Then slit-seed at 3 to 5 pounds per 1,000 square feet.
If you’re seeding into warm-season turf, read up on crowding out Bermuda before you commit, because timing changes everything.
Pasture and forage stands: drill vs. broadcast
Drilling puts seed at a consistent depth and uses less of it, roughly 20 to 25 pounds per acre. Broadcasting is faster on rough ground but needs 30 to 35 pounds per acre and a cultipacker pass afterward. Seed labels that mislead are common in cheap pasture mixes, so check the tag.
Step-by-Step Soil Preparation Checklist Before Seeding
Once you’ve chosen the right preparation method, work through these steps before opening your seed bag. The order matters, especially when you’re starting with bare ground.
-
Clear the surface: Remove weeds, rocks, dead grass, and other debris. For existing lawns, follow the aeration and dethatching method instead.
-
Test and amend the soil: Check pH and nutrient levels. Apply lime, sulfur, phosphorus, or potassium only when your soil test recommends them.
-
Improve the soil: Work compost into poor soil where needed. Break up compacted areas only when the ground is dry enough to crumble.
-
Level the surface: Rake out large clods, fill low spots, and create an even grade.
-
Settle and firm the bed: Water lightly, roll the surface, and allow loose soil to settle.
-
Check before seeding: Walk across the bed. Footprints should barely sink in, and the surface should feel firm rather than muddy or fluffy.
Once the bed passes this check, you’re ready to focus on seed depth, application rate, and moisture.
Seeding Depth, Rate, and Moisture: Winning Seed-to-Soil Contact
Depth, soil temperature, and the germination window
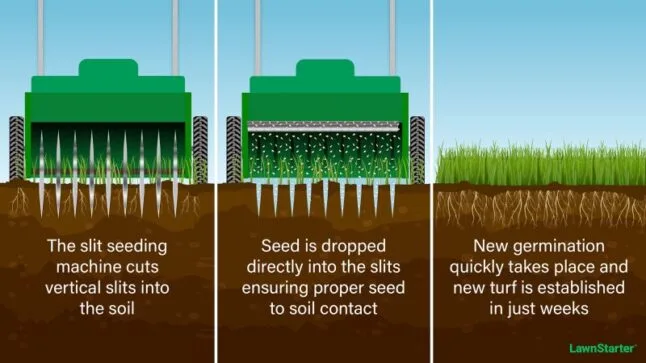
Image source: Web (Bing) / lawnstarter.com
A quarter inch is the number to remember. Deeper than that and emergence drops off sharply. Soil temperature at two inches drives the calendar: 50°F is the floor, 65 to 70°F is the sweet spot.
At warm temperatures you’ll see green in five to seven days. At 50°F, budget 10 to 14.
Calibrating a spreader and seeding rates by project
| Project | Rate |
|---|---|
| New turf lawn | 6 to 8 lb per 1,000 sq ft |
| Overseeding | 3 to 5 lb per 1,000 sq ft |
| Pasture, drilled | 20 to 25 lb per acre |
| Pasture, broadcast | 30 to 35 lb per acre |
Calibrate the spreader on a driveway or tarp first. Then apply half the seed going one direction and half at right angles. Two passes beat one heavy pass every time, and they hide streaks.
Irrigation through the first three weeks
Keep the top inch moist, not soaked. Two or three short cycles a day beats one long soak before emergence. Once seedlings are up and mowed once, switch to deeper, less frequent watering to push roots down.
Its thirst for water is real, but soggy soil causes damping-off faster than drought causes failure. Sowing in hot weather makes all of this harder, so shade and extra cycles help.
Mistakes That Wreck a Ryegrass Stand
Almost every failure we see traces back to four habits. None of them look like mistakes at the time.
Loose, fluffy seedbeds and planting too deep
If the bed feels like a bag of potting mix underfoot, it’s too loose. Roots hit air pockets and dry out before they anchor. Firm it, water it, and let it settle.
Depth is the other half of that equation. A quarter inch is a ceiling, not a suggestion. Getting the depth right matters more than the seeding rate does.
Herbicide carryover and annual seed sold as perennial
Check your herbicide history before you spend a dollar on seed. Products containing prodiamine or pendimethalin can block ryegrass germination for months after application. Read the label interval, then add a buffer.
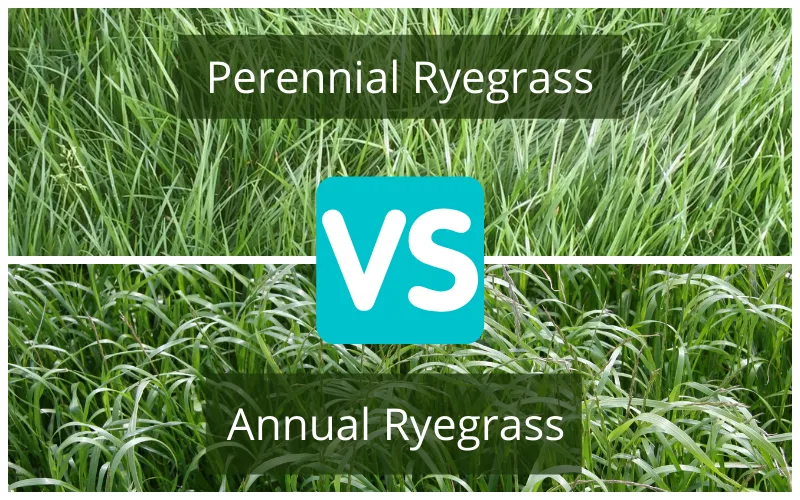
Seed tags deserve the same scrutiny. Cheap blends often hide annual types sold as perennial, and you’ll only notice when the stand dies back the following summer.
Slope washout, patchy spread, and overwatering
On anything steeper than a gentle grade, straw mulch or an erosion blanket is not optional. Seed and topsoil leave together in the first hard rain.
Patchiness usually comes from a spreader that was never calibrated. Two passes at right angles fix that. Overwatering is the quieter killer, since soggy soil invites damping-off within days.
Quick Decision Guide: Match Your Situation to the Right Workflow
Find your situation in the left column. Then follow the row.
| Your situation | Workflow | Seed rate |
|---|---|---|
| Bare soil, no vegetation | Kill, deep-till 6 to 8 inches, amend, grade, firm | 6 to 8 lb per 1,000 sq ft |
| Thin lawn, under 50% cover | Core aerate twice, dethatch, slit-seed | 3 to 5 lb per 1,000 sq ft |
| Thick thatch, spongy surface | Dethatch first, then overseed or renovate | 3 to 5 lb per 1,000 sq ft |
| Heavy clay, standing water | Fix drainage, till dry, add compost | 6 to 8 lb per 1,000 sq ft |
| Sandy ground | Add compost, plan short irrigation cycles | 6 to 8 lb per 1,000 sq ft |
| Pasture or hay ground | Drill if level, broadcast and cultipack if rough | 20 to 35 lb per acre |
| Steep slope | Hydroseed or blanket, never bare broadcast | 6 to 8 lb per 1,000 sq ft |
Three shortcuts worth remembering. If the ground is wet enough to ball up in your hand, wait. If the lawn is more than half bare, renovate instead of overseeding.
If you’re seeding into warm-season grass, sort out crowding out Bermuda first.
Seeding in hot weather shifts the whole schedule too. In that case, seed later in the day and lean on light, frequent cycles until emergence.
Frequently Asked Questions
How long does perennial ryegrass take to germinate?
Five to seven days when soil at two inches sits between 65 and 70°F. Drop to 50°F and you’re waiting 10 to 14 days. Keep the top inch moist the whole time and don’t let it crust over.
Do I have to rototill before seeding ryegrass?
No. Tilling is for bare ground and full renovations. Overseeding into an existing lawn works better with core aeration and slit-seeding, since tilling destroys the turf you’re trying to keep and stirs up weed seed.
What pH does perennial ryegrass need?
Aim for 6.0 to 6.5. Below 5.8, phosphorus locks up and the plants tiller poorly. Above 7.0, iron and manganese start dropping out of reach.
Adjust with lime or elemental sulfur based on a lab test, not a guess.
Can I seed right after spraying weed killer?
Only after the labeled interval passes. Glyphosate needs roughly 10 to 14 days for full kill. Pre-emergent herbicides are the bigger risk, since residual activity can stop ryegrass germination for weeks or months depending on the product.
How much compost should I work into the soil?
Two to three cubic yards per 1,000 square feet is a solid starting point for poor soil, worked into the top four inches. Sandy ground benefits most. Skip it on already-rich loam and put the money into a soil test instead.