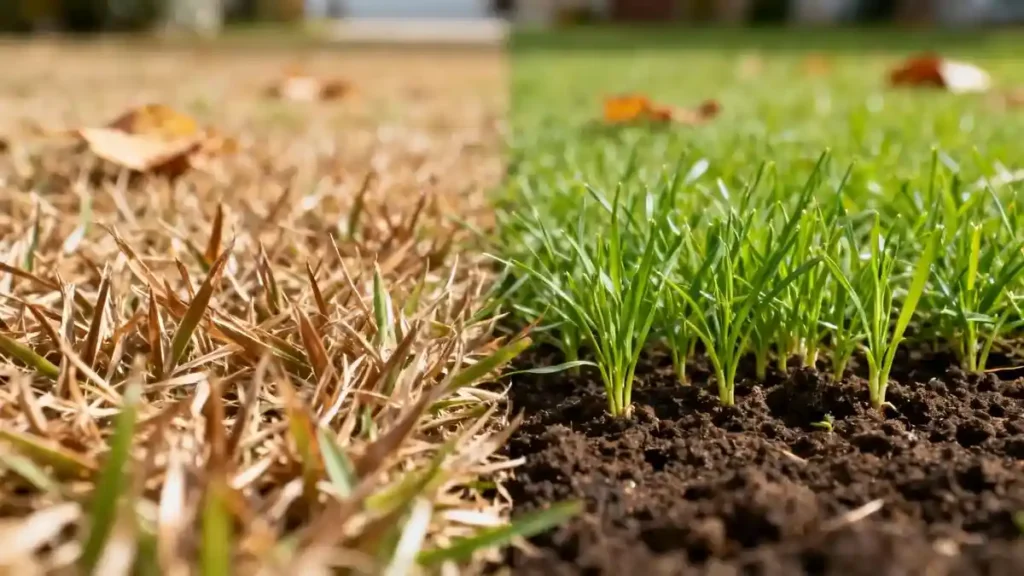
When to Plant Bermuda Grass in North Carolina
North Carolina sits squarely in the transition zone, where warm-season and cool-season grasses overlap and neither thrives effortlessly. Bermuda grass, however, is the standout choice for full-sun lawns across the Piedmont and Coastal Plain. It shrugs off July heat, survives drought, and repairs itself aggressively—but only if you plant it at the right moment.
Timing is everything. Seed sown into cold soil rots or gets scavenged by birds. Seed planted too late faces a killing frost before roots establish. Understanding your region's soil temperatures and microclimate separates a thick, carpet-like lawn from a patchy, disappointing one.
The Short Answer
The ideal window for planting Bermuda grass seed in North Carolina runs from mid-May through mid-June. You want soil temperatures to hold steady at 65°F or warmer for three consecutive mornings. This late-spring window gives seed optimal germination conditions (typically 10 to 21 days) and about 90 to 120 days of summer heat to build a deep root system before fall dormancy.
Soil temperature, not air temperature, is your true signal. Air can feel warm while the ground remains stubbornly cold—especially in the clay-heavy soils common across the state. A simple soil thermometer is the most reliable tool you can own for this decision.
Understanding North Carolina's Climate Zones
North Carolina spans USDA Hardiness Zones 6b in the western mountains to 8b along the coast. Bermuda grass performs brilliantly in the Piedmont and Coastal Plain, where summer heat is intense and winters are relatively mild. In the Blue Ridge Mountains, however, cooler summers and harsher winters can stress Bermuda, which prefers consistent warmth.
Regional planting windows:
| Region | Recommended Seeding Window |
|---|---|
| Coastal Plain (Wilmington, Greenville) | Mid-April to late May |
| Piedmont (Charlotte, Raleigh, Greensboro) | Mid-May to mid-June |
| Western Mountains (Asheville, Boone) | Late May to late June (with caution) |
Coastal areas warm up earlier and retain heat longer, extending the practical season. Mountain gardeners should consider Bermuda only if they have a full-sun, sheltered site; even then, the shorter growing season makes establishment riskier.
Full Sun Is Non-Negotiable
Bermuda grass demands a minimum of six to eight hours of direct sunlight daily. In partial shade, it thins out, becomes leggy, and eventually dies. If your yard has significant tree cover, this is simply the wrong grass. A fescue blend or another shade-tolerant species would serve you better.
Soil Preparation: The Foundation for Success
Bermuda can grow in poor soil, but it thrives in prepared soil. Skipping preparation is the most common error I see, particularly with the heavy red clay found around Raleigh and Charlotte.
Test Your Soil First
Order a soil test from the NC State Extension—it's inexpensive and tells you exactly what amendments you need. Bermuda prefers a pH between 6.0 and 6.5. North Carolina soils run notoriously acidic, often below 5.5. If your test shows low pH, apply lime several weeks before planting to give it time to react.
Kill Existing Vegetation
Two to three weeks before planting, spray existing weeds and old grass with a non-selective herbicide. Bermuda seed needs bare soil contact to germinate. Competing vegetation steals moisture, light, and nutrients during the critical establishment phase.
Relieve Compaction
Clay soil compacts easily, forming a barrier that shallow Bermuda roots cannot penetrate. Core aeration or light tilling is necessary for most Piedmont lawns. After aerating, spread a thin layer of compost or topsoil over the area—about ¼ inch is sufficient. This improves drainage, adds organic matter, and gives seedlings a nutrient-rich medium to root into.
Level the Surface
Bermuda spreads via stolons and rhizomes, and it fills in bare patches quickly. However, low spots collect water and create breeding grounds for disease. Take time to rake and level the soil before seeding, ensuring a smooth surface for mowing later.
Step-by-Step Seeding Instructions
1. Choose Quality Seed
Purchase hulled Bermuda seed for faster germination. Hulled seed has the outer coating removed, allowing water to penetrate quicker. A premium blend suited to North Carolina conditions outperforms bargain-bin options. For most home lawns, a common Bermuda variety works well; hybrid options like Tifway are best installed via sod or sprigs, as their seed is sterile or unreliable.
2. Wait for Soil Temperature
Use a soil thermometer inserted two inches deep in your planting area. When it reads 65°F for three consecutive mornings—usually between 7 and 9 AM—your window is open. This typically aligns with daytime air temperatures in the mid-80s.
3. Spread the Seed Evenly
Bermuda seed is extremely small. Use a broadcast spreader at a rate of 1 to 2 pounds per 1,000 square feet. For even coverage, split the seed in half: walk north-south with the first half, then east-west with the second. Crisscrossing patterns prevent the thin and thick stripes that happen when seed is applied in a single pass.
4. Rake and Roll
Lightly rake the seeded area to ensure seed-to-soil contact—critical for germination. You want the seed buried no deeper than ¼ inch. Deeper burial means the seedling runs out of stored energy before reaching sunlight. If you have a lawn roller, fill it halfway with water and roll the area firmly to press seed into the soil.
5. Protect from Erosion
On slopes, apply a light straw mulch (one bale per 1,000 square feet) to hold seed in place and retain moisture. This is especially important in the Piedmont's hilly terrain. Leave the mulch in place; it breaks down harmlessly.
Watering: The Make-or-Break Phase
During germination and establishment, watering is the most critical maintenance task. The top inch of soil must remain consistently moist—never saturated, but never dry.
Establishment watering schedule:
- Weeks 1–2: Water 2 to 3 times daily for 5 to 10 minutes per session, keeping the top inch moist. Light, frequent watering prevents seed from washing away.
- Weeks 3–4: Reduce to once daily, watering deeper to encourage root growth downward.
- Weeks 5–6: Water every 2 to 3 days, applying up to ½ inch per session.
- After establishment: Shift to deep, infrequent watering—about 1 inch per week in a single session.
A common mistake is allowing the surface to dry out completely for even one day during the first two weeks. Daily monitoring is essential. Set reminders on your phone; this phase requires discipline.
Fertilizing Your New Bermuda Lawn
Bermuda is a heavy feeder. However, the timing of your first fertilizer application matters enormously.
Do not fertilize at planting. A starter fertilizer with phosphorus is acceptable if your soil test indicates a deficiency, but standard high-nitrogen fertilizer will burn emerging seedlings. Wait until the new grass reaches 2 to 3 inches tall and has been mowed at least once.
Once established, feed Bermuda on a regular schedule:
| Timing | Action |
|---|---|
| Late May | Apply 1 lb nitrogen per 1,000 sq ft |
| Early July | Apply 1 lb nitrogen per 1,000 sq ft |
| Mid-August | Apply 1 lb nitrogen per 1,000 sq ft |
Avoid nitrogen after mid-September. Late-season feeding promotes lush growth that remains active into fall, increasing susceptibility to winter kill and spring dead spot disease. The grass needs time to harden off before dormancy.
Always sweep stray fertilize granules off sidewalks and driveways. They stain concrete and contribute to nutrient runoff into waterways.
Weed Control Strategy
Weed management in a newly seeded lawn requires patience and a different approach than an established lawn.
First-Year Rules
You cannot use pre-emergent herbicides in the spring before seeding—they will prevent your grass seed from germinating alongside the weeds. The standard barrier products are indiscriminate.
For the first season, rely on post-emergent herbicides only after you have mowed the new grass at least three times. Even then, spot-treat rather than broadcast-spray to minimize stress on young turf.
Weed-and-feed combination products are particularly dangerous for new lawns. The herbicidal components are too harsh for immature root systems and can destroy everything you've worked to establish.
Established Lawn Strategy
In year two and beyond, implement a strict pre-emergent barrier:
- Late February: Apply pre-emergent to prevent crabgrass and summer annual weeds.
- Early September: Apply the second application to target Poa annua (annual bluegrass).
This two-pronged approach stops the most troublesome weeds before they emerge, reducing your reliance on post-emergent products.
Seasonal Maintenance Calendar
Bermuda's needs shift dramatically across the year. Adjusting your care to its natural growth cycle minimizes stress and maximizes density.
| Season | Primary Focus | Mowing Height |
|---|---|---|
| Spring (March–May) | Green-up, pre-emergent application | 1.0 to 1.5 inches |
| Summer (June–August) | Fertilize, water deeply, mow frequently | 1.5 to 2.0 inches |
| Fall (September–November) | Slow down feeding, prepare for dormancy | 2.0 inches |
| Winter (December–February) | Begin resting; no mowing needed | Leave untouched |
Raising the mowing height slightly in late fall provides insulation for the plant's crown against freezing temperatures. Dormant grass should be left alone—traffic during dormancy can damage the crowns and create bare patches next spring.
Common Bermuda Grass Problems and Fixes
Even the toughest lawns encounter issues. Poor mowing practices and overwatering cause the majority of problems I see.
| Problem | Visual Symptom | Solution |
|---|---|---|
| Spring Dead Spot | Circular dead patches as green-up occurs | Improve drainage; reduce fall nitrogen |
| Armyworm Infestation | Rapid browning, chewed blades | Apply liquid bifenthrin immediately |
| Soil Compaction | Water runoff, thin grass | Core aerate during active summer growth |
| Thatch Buildup | Spongy feel, scalped appearance | Dethatch in late spring |
Watch for increased bird activity in late summer—it's a telltale sign of grubs or worms moving up to the surface. Addressing an armyworm outbreak early is critical, as they can decimate a lawn in days.
For the smaller bare patches that stubbornly refuse to fill in, dig out the top two inches of dead material, loosen the soil, mix in a handful of compost, and water lightly. Bermuda's stolons will naturally colonize the softened spot within a few weeks.
Tools Worth Owning
You don't need a garage full of equipment to grow great Bermuda, but a few investments make a measurable difference.
- Sharp mower blades: Bermuda is thick and wiry. Dull blades tear rather than cut, leaving frayed white tips that invite disease. Sharpen or replace blades twice per season.
- Core aerator: Rent one annually for compacted clay lawns. The timing of aeration matters as much as the practice itself—target active growth periods.
- String trimmer: Bermuda's aggressive runners creep over sidewalks and into beds quickly. A quality trimmer keeps edges clean and prevents invasion.
- Soil thermometer: An inexpensive probe removes guesswork from the planting decision and remains useful for understanding growth temperature thresholds all season.
Sod: The Faster Alternative
If you want an instant lawn and have the budget, consider Bermuda sod rather than seed. Sod can be laid slightly earlier in spring and later into summer because it arrives with an established root system. It costs significantly more but eliminates the germination phase and the constant watering demands.
Frequently Asked Questions
Can I plant Bermuda grass in North Carolina in the fall?
No. Fall planting of Bermuda seed is nearly always a waste of money. Soil temperatures are dropping, and young seedlings lack the root mass to survive freezing temperatures. Fall is the time for cool-season grass establishment, not warm-season varieties.
How often should I water an established Bermuda lawn?
Deeply and infrequently. Aim for about 1 inch of water per week during the growing season, applied in a single early-morning session. This encourages deep root growth. Daily light watering produces shallow roots that cannot withstand stress.
Why is my Bermuda grass brown in winter?
Bermuda is a warm-season grass that naturally goes dormant when soil temperatures drop below 50°F. This typically happens around November in North Carolina. The grass isn't dead—it's protecting itself from freezing. It will green up again in April or May when soil warms.
What is the ideal mowing height?
For most residential lawns, maintain Bermuda between 1.0 and 1.5 inches during the growing season. Cutting short encourages lateral spread and density. Letting it grow past 2 inches results in thin, leggy turf with weak crowns. For detailed guidance, see these mowing height recommendations.
Does Bermuda spread on its own?
Aggressively. It spreads via above-ground stolons and below-ground rhizomes, making it self-repairing. When a dog digs a hole or furniture creates a dead spot, surrounding grass naturally fills it in during summer—provided growing conditions remain favorable.
How long until I have a full lawn?
From seed, expect to wait roughly 6 to 10 weeks for significant coverage, and a full season (year one) for a dense, walkable lawn. Speeding up the process comes down to consistent watering and mowing at the right height. The full growth timeline depends heavily on your specific conditions.
The Bottom Line
Planting Bermuda grass in North Carolina comes down to one rule above all others: wait for the soil to warm up. Monitor soil temperatures in May, prepare your clay soil thoroughly, and water religiously during the first two weeks. The grass will reward your patience with a dense, drought-tolerant, self-repairing lawn that thrives through the hottest Carolina summers.
- Target window: mid-May to mid-June
- Critical threshold: 65°F soil temperature
- Non-negotiables: full sun, proper pH, bare soil contact, consistent moisture
Get the timing right and set the stage properly—Bermuda is the most forgiving warm-season grass in the transition zone once established. If you're ready to start, routines for long-term care will keep your new lawn strong for decades. For comprehensive seasonal maintenance, the year-round approach ensures consistently green growth even in challenging years.
Your soil temperature readings are your most reliable guide—trust them over the calendar, and your lawn will show the difference.